Let’s see some of the ways to bring your iPhone back to its normal state if you are stuck wth the “iPhone is disabled, connect to iTunes.”
Why Is Your iPhone Disabled?
If you forgot your passcode, you have five chances to enter the correct one to unlock your iPhone. After that, for every wrong passcode, you will see the error messages given below.
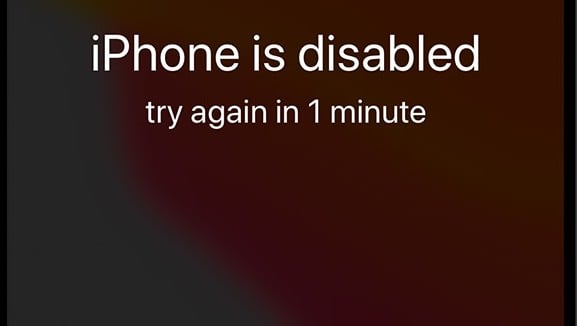
If you enter the wrong passcode for the 6th time, “iPhone is Disabled. Try again in 1 minute”7th time – “iPhone is Disabled. Try again in 5 minutes” 8th time – “iPhone is Disabled. Try again in 15 minutes” 9th time – “iPhone is Disabled. Try again in 60 minutes”
When you enter a wrong passcode for the 10th time, you will be locked out of your device and you will see the error message “iPhone is Disabled. Connect to iTunes”. i.e you cannot enter a wrong passcode more than 10 times.
Use Recovery Mode to Get Your iPhone Out of Disabled Mode
After your iPhone is disabled, you need to use a computer or Mac and put the device in recovery mode to return to normal. However, you will lose all your data in the recovery process. Of course, you can restore the contents on your iPhone provided you take regular backup using iCloud. If you don’t know how to put your device in recovery mode, you can refer to our post on How to Force Restart iPhone and Enter iPhone Recovery Mode. Once your device is put in recovery mode, you need to completely erase the device by clicking the Restore option and then setting it up as a new device. Make sure you note down the passcode somewhere to avoid your iPhone from getting disabled again.
Use iCloud to Fix iPhone Disabled Issue
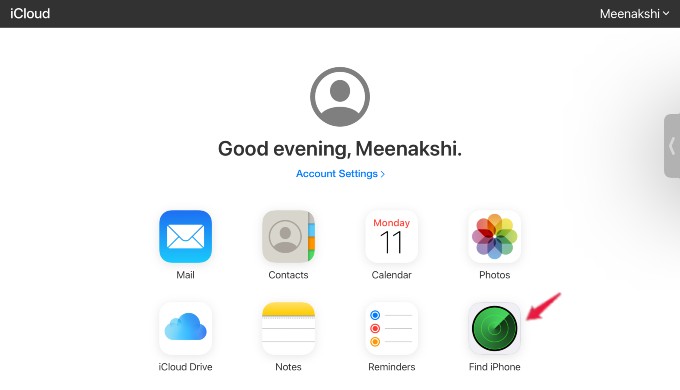
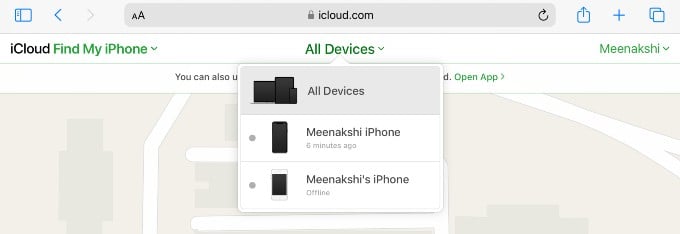
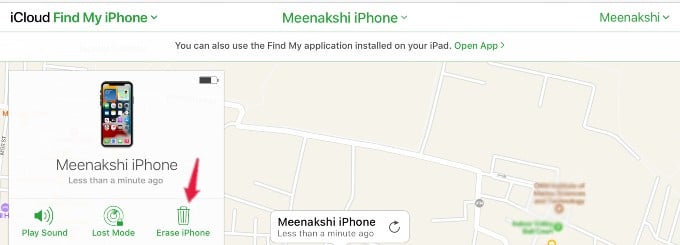
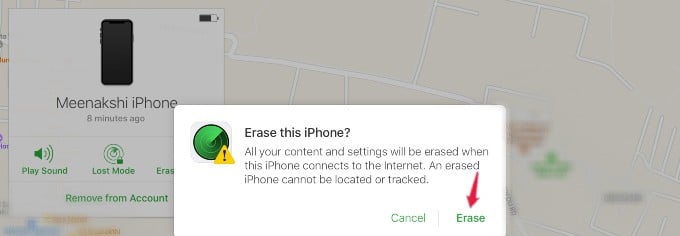
For some reason, if you are not able to restore your iPhone using iTunes, you can try out the iCloud method. However, this will work only if your iPhone has a data connection and you have enabled Find My feature on your device. On your Windows computer, Mac, iPad, or another iPhone, go to icloud.com and log in to your Apple account. Make sure you use the same Apple ID you use on the disabled iPhone. Once you are logged in, click Find iPhone shown on your iCloud account page. After a few seconds or so, you will see the location map of all the devices using that iCloud account. Then, click All Devices shown on the top and select the disabled iPhone. Next, click Erase iPhone on the pop-up menu. Finally, click Erase in the confirmation menu that pops up on the screen to erase the device completely.
Use Third-Party Software to Fix Disabled iPhone
Though the above two methods will completely erase the data on your iPhone, they are the safest solutions. If your device doesn’t have any sensitive information and you don’t mind experimenting with things, then you can go for a third-party solution to fix your disabled iPhone. Always remember that using third-party software might put any personal data on your device at risk.
Take Your iPhone to Apple Service Center
If you are not tech-savvy and don’t like the concept of DIY, then the best option is to take your device to any authorized Apple Service Center or Apple Store and bring it back to normal.
Δ


